BASIC認証のおさらい
例えば公開前のホームページを見られたくない場合や
見られてもそこまで困らないけどできれば見せたくないページ、
手間はかけたくないけど気休めでもセキュリティを上げたい場合とかありますよね?
そんなときによく使われるのがベーシック認証。
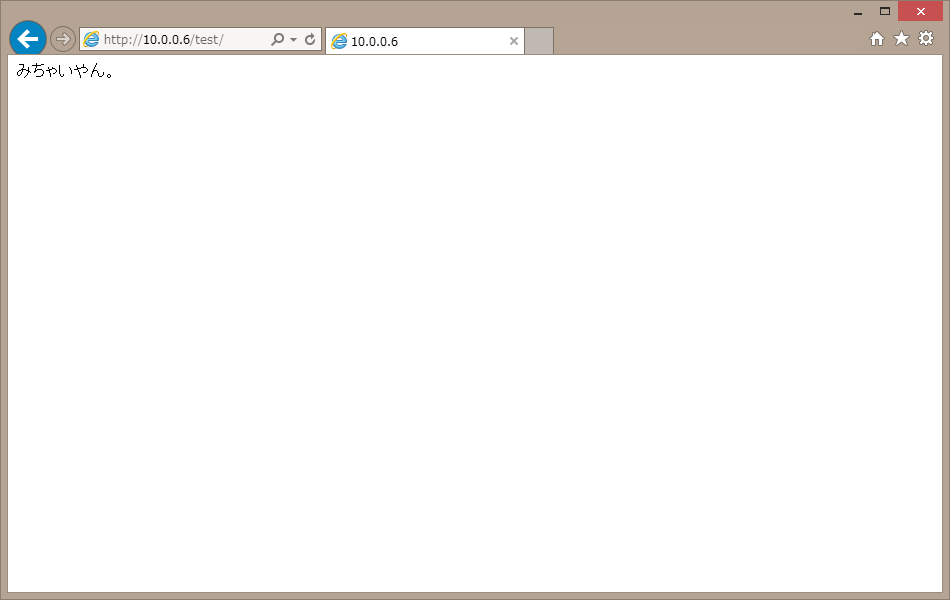
↓たまにこんな感じの認証を見かけますよね?
ここでチョチョイのチョイとアイパスを入れると中に入れる簡単なしくみですね~。
しかし…
Accept:text/html,application/xhtml+xml,application/xml;q=0.9,image/webp,image/apng,*/*;q=0.8
Accept-Encoding:gzip, deflate
Accept-Language:ja-JP,ja;q=0.8,en-US;q=0.6,en;q=0.4
Authorization:Basic aGFyYWRhOm9wcGFp
Cache-Control:max-age=0
Connection:keep-alive
Host:10.0.0.6
Upgrade-Insecure-Requests:1
User-Agent:Mozilla/5.0 (Windows NT 6.3; Win64; x64) AppleWebKit/537.36 (KHTML, like Gecko) Chrome/59.0.3071.115 Safari/537.36
上の例は、BASIC認証配下にFirefoxでアクセスした際のリクエストヘッダですが
このうち以下の部分がBASIC認証のヘッダとなります。
Authorization:Basic aGFyYWRhOm9wcGFp
この文字列を、以下のようにbase64コマンドでデコードすると・・・
# echo aGFyYWRhOm9wcGFp | base64 -d
harada:oppai

とまぁこんな感じでパスワードがバレてしまうのですね。
BASIC認証は全く暗号化されていないので怖いよねぇ~…
Digest認証を使う
平文でIDパスワードが流れるので、これを止めて
パスワード(+α)からメッセージダイジェストを生成して
それをやりとりするのがDigest認証です。
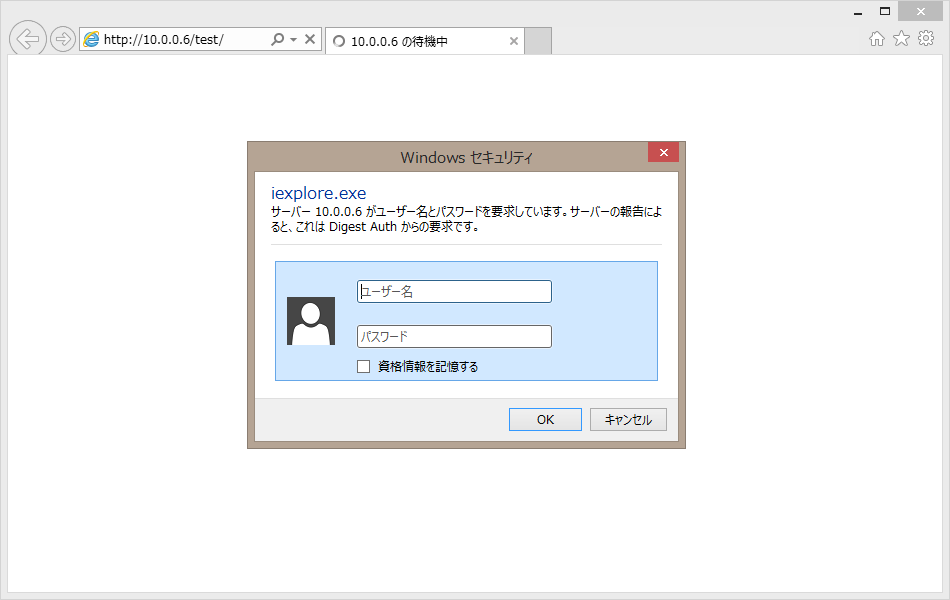
一件普通のベーシック認証の画面ですが・・・(IEだとDigest認証と出ます。)
Firefoxで、IDパスワードを入力した際のリクエストヘッダが以下の通り
Accept:text/html,application/xhtml+xml,application/xml;q=0.9,image/webp,image/apng,*/*;q=0.8
Accept-Encoding:gzip, deflate
Accept-Language:ja-JP,ja;q=0.8,en-US;q=0.6,en;q=0.4
Authorization:Digest username="harada", realm="Digest Auth", nonce="Npoa0s5UBQA=80a83b989089b9b7f310f36f928c13e7d8b2e180", uri="/test/", algorithm=MD5, response="c06701eecee0a13e649233608facab14", qop=auth, nc=00000001, cnonce="750003ea4c453284"
Cache-Control:max-age=0
Connection:keep-alive
Host:10.0.0.6
Upgrade-Insecure-Requests:1
User-Agent:Mozilla/5.0 (Windows NT 6.3; Win64; x64) AppleWebKit/537.36 (KHTML, like Gecko) Chrome/59.0.3071.115 Safari/537.36
見て分かる通り、Authorization:ヘッダはBASIC認証に比べてとても複雑です。
Authorization:Digest username="harada", realm="Digest Auth", nonce="Npoa0s5UBQA=80a83b989089b9b7f310f36f928c13e7d8b2e180", uri="/test/", algorithm=MD5, response="c06701eecee0a13e649233608facab14", qop=auth, nc=00000001, cnonce="750003ea4c453284"
usernameは、ログインする際のユーザ名で、ダイアログボックスに入力した値です。
見て分かる通り、Digest認証ではユーザ名は平文で流れるため、
ユーザ名自体も隠したい場合にはDigest認証は意味がありません。
username="harada"
realmは認証領域という意味で、
Webブラウザの実装としては同じrealmにはID/パスワード再入力を求めない、とか。
BASIC認証ではこのrealmはあまり意識してなかったですが
Digest認証ではこのrealm設定をしてあげないと、きちんと動いてくれません。
realm="Digest Auth"
responseは「色々とごにょごにょ弄って暗号化された値」です。
ごにょごにょの部分は解説が面倒なので端折りますが
基本的にはnonceとパスワードをこねくり回してMD5を取る、イメージです。
サーバ側でも同様にMD5を取り、それが一致すれば認証OKということになります。
response="c06701eecee0a13e649233608facab14"
ApacheでのDigest認証の設定
ApacheでDigest認証を利用したい場合、
BASIC認証の場合と設定は似ていますが、若干違う部分もあってハマることがあるのでまとめておきます。
パスワードファイルはhtdigestコマンドを利用して作成します。
Digest認証では、realmの値が必須です。
ユーザ名guestのパスワードファイルは以下のように作れます。
# htdigest -c .htpasswd "Digest Auth" guest
Adding password for guest in realm Digest Auth.
New password:
Re-type new password:

# cat .htpasswd
guest:Digest Auth:f93506ed7feb173be75b80a90a01152c
できあがったパスワードファイルには、中央部分にrealmの値も一緒に含まれています。
Apache側の設定です。.htaccessの場合はこんな感じ。
# .htaccess
AuthType Digest
AuthName "Digest Auth"
AuthUserfile /hoge/fuga/.htpasswd
require valid-user
AuthTypeはBASICではなくDigestになります。
また、AuthNameはrealmと必ず一致させます。それ意外は、BASIC認証と同様です。
NginxでのDigest認証の設定
Apacheで設定できたんだから、Nginxでも設定できるでしょう。
と、普通なら思いますが、公式サイトに以下の記述が…。
The ngx_http_auth_digest module supplements Nginx's built-in Basic Authentication module by providing support for RFC 2617 Digest Authentication.
The module is currently functional but has only been tested and reviewed by its author.
And given that this is security code, one set of eyes is almost certainly insufficient to guarantee that it's 100% correct.
Until a few bug reports come in and some of the ‘unknown unknowns’ in the code are flushed out, consider this module an ‘alpha’ and treat it with the appropriate amount of skepticism.
(訳. Nginxではngx_http_auth_digestは標準でサポートされていません。)
_人人人人人人_
> 使えない <
 ̄Y^Y^Y^Y^Y ̄
なんでもdigest_authのモジュールは検証段階とかで
既知の問題が解決できるまで実装しないとのこと。うーん…。
ソースからコンパイルしてみる
実はサードパーティからモジュールが入手できるらしく、
ソースをコンパイルすればdigest認証が使えるようになります。
今回は既にyumでインストールしたNginxが稼働している前提で話を進めます。
Nginxのソースを取得
Nginxデベロッパーサイトから使用したいバージョンのソースコードを取得し、展開します。
今回はyumでインストールしたバージョンと同じでコンパイルします。
# cd /usr/local/src
# wget http://nginx.org/download/nginx-1.10.3.tar.gz
# tar zxvf nginx-1.10.3.tar.gz
githubよりdigest認証用のリポジトリをクローンします。このリポジトリはnginx公式wikiに書かれているものと違います。
# git clone https://github.com/atomx/nginx-http-auth-digest
Initialized empty Git repository in /root/nginx-http-auth-digest/.git/
remote: Counting objects: 145, done.
remote: Total 145 (delta 0), reused 0 (delta 0), pack-reused 145
Receiving objects: 100% (145/145), 100.11 KiB | 155 KiB/s, done.
Resolving deltas: 100% (91/91), done.


# ll nginx-http-auth-digest/
total 88
-rw-r--r-- 1 root root 1216 Aug 6 04:26 LICENSE
-rw-r--r-- 1 root root 2520 Aug 6 04:26 bugs.txt
-rw-r--r-- 1 root root 409 Aug 6 04:26 config
-rwxr-xr-x 1 root root 1872 Aug 6 04:26 htdigest.py
-rw-r--r-- 1 root root 46984 Aug 6 04:26 ngx_http_auth_digest_module.c
-rw-r--r-- 1 root root 10965 Aug 6 04:26 ngx_http_auth_digest_module.h
-rw-r--r-- 1 root root 8633 Aug 6 04:26 readme.rst
configure
まずは、nginxのソースのあるディレクトリに移動…
# cd nginx-1.10.3
# ll
total 692
-rw-r--r-- 1 1001 1001 265299 Jan 31 2017 CHANGES
-rw-r--r-- 1 1001 1001 404694 Jan 31 2017 CHANGES.ru
-rw-r--r-- 1 1001 1001 1397 Jan 31 2017 LICENSE
-rw-r--r-- 1 1001 1001 49 Jan 31 2017 README
drwxr-xr-x 6 1001 1001 4096 Aug 6 04:33 auto
drwxr-xr-x 2 1001 1001 4096 Aug 6 04:33 conf
-rwxr-xr-x 1 1001 1001 2481 Jan 31 2017 configure
drwxr-xr-x 4 1001 1001 4096 Aug 6 04:33 contrib
drwxr-xr-x 2 1001 1001 4096 Aug 6 04:33 html
drwxr-xr-x 2 1001 1001 4096 Aug 6 04:33 man
drwxr-xr-x 9 1001 1001 4096 Aug 6 04:33 src
それからconfigureです。既に稼働しているNginxに影響を与えないよう、別ディレクトリにインストールします。
今回インストールするディレクトリは「/usr/local/nginx」とします。
configureのオプションはこんな感じ
–with-http_realip_module
–with-http_addition_module
–with-http_gzip_static_module
–with-http_gunzip_module
–with-http_image_filter_module
–with-http_stub_status_module
–with-http_ssl_module
–with-http_sub_module
–with-http_xslt_module
–with-sha1=/usr/include/openssl
–with-md5=/usr/include/openssl
–with-http_v2_module
–with-debug –add-module=../nginx-http-auth-digest
–prefix=/usr/local/nginx
こんな感じ。
最後の2つ
-with-debug –add-module=../nginx-http-auth-digest
-prefix=/usr/local/nginx
が、それぞれDigest認証のモジュールソースのディレクトリの指定(–add-module=../nginx-http-auth-digest)と
インストールディレクトリの指定(–prefix=/usr/local/nginx-source)になります。
# cd /usr/local/src/nginx-1.10.3
# ./configure --with-http_realip_module --with-http_addition_module --with-http_gzip_static_module --with-http_gunzip_module --with-http_image_filter_module --with-http_stub_status_module --with-http_ssl_module --with-http_sub_module --with-http_xslt_module --with-sha1=/usr/include/openssl --with-md5=/usr/include/openssl --with-http_v2_module --with-debug --add-module=../nginx-http-auth-digest --prefix=/usr/local/nginx
# make
# make install
ちなみにモジュールがかなり足りなくてconfigureでエラー出まくりでしたが
最終的にはyumで以下のパッケージをインストールしてます。
pcre-devel
openssl-devel
libxslt-devel
gd-devel
perl-ExtUtils-Embed
GeoIP-devel
インストールもうまく行ったのでDigest認証の設定をしましょう。
Digest認証用の設定
まずは前提として
- http://18.183.225.540/secret/以下を認証の対象とする
- auth以下にはindex.htmlをおいてアクセスできたら「OK!!」と表示する
なので、10.0.0.100のwebrootの下にsecretディレクトリを作成し
index.htmlも作成しておきます。
この状態でhttp://18.183.225.540/secret/にアクセスすると…。
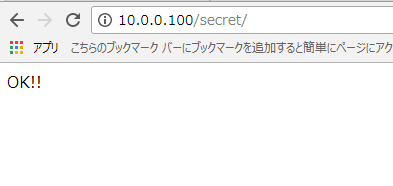
表示できました。それでは認証の設定に参りましょう。
Nginxの設定
リポジトリに設定方法が書いてあったのでこちらを参照します。
Example
Directives
# vi /etc/nginx/conf.d/default.conf

    auth_digest_user_file /var/www/.htpasswd;
    location /secret{
      auth_digest  'Secret Zone';
    }
ポイントは以下の2点。
- パスワードファイルの場所
- 認証対象のディレクトリ名
です。
パスワードファイルの作成
認証用のファイルの作り方ですが、githubには以下の記述が。
The password file should be of the form created by the apache htdigest command (or the included htdigest.py script). Each line of the file is a colon-separated list composed of a username, realm, and md5 hash combining name, realm, and password. For example: joi:enfield:ef25e85b34208c246cfd09ab76b01db7
とのことなので、apache付属のhtdigestを使うか、
Digest認証モジュールに含まれているhtdigest.pyを使うとのことです。
htdigest.pyでの作成方法は以下の通り
# /usr/local/src/nginx-http-auth-digest/htdigest.py
usage: htdigest.py passwdfile username 'realm name'

# /usr/local/src/nginx-http-auth-digest/htdigest.py /var/www/.htpasswd harada 'Secret Zone'
/var/www/.htpasswd does not exist. Create it? (y/n) y
Password for new user "harada":
Please repeat the password:
パスワードファイルももうまく出来上がったようです。
なお、htdigestでの作成方法は以下の通り
# htdigest -c /var/www/.htpasswd 'Secret Zone' harada
設定ファイルのテスト
# nginx -t
nginx: [emerg] unknown directive "auth_digest_user_file" in /etc/nginx/conf.d/default.conf:17
nginx: configuration file /etc/nginx/nginx.conf test failed
あああああああああああ!!!!!(ブリブリュリュ!!!!!!ブツチチブブブチチチチブリリイリブブブブゥゥゥゥッッッ!! )
と思ったけど、よく考えたら今動いているnginxは
Digest認証モジュールを含まないのでエラーが出て当然です。
新しいNginxを稼働させる
さーて、どうするかなぁと考えた結果、ソース版を本稼働させてyum版を消し去ることに。
影響与えないとか言ってたのに、急な方向転換よ。
# /usr/local/nginx/sbin/nginx -t
nginx: the configuration file /usr/local/nginx/conf/nginx.conf syntax is ok
nginx: configuration file /usr/local/nginx/conf/nginx.conf test is successful
とりあえず新しいバージョンの nginx は設定に問題がないことを確認。
# /etc/init.d/nginx stop
既存のnginxを止めて、削除します。
# yum remove nginx
読み込んだプラグイン:fastestmirror
削除処理の設定をしています
依存性の解決をしています
--> トランザクションの確認を実行しています。
---> Package nginx.x86_64 0:1.10.2-1.el6 will be 削除
--> 依存性の処理をしています: nginx のパッケージ: nginx-mod-http-perl-1.10.2-1.el6.x86_64
--> 依存性の処理をしています: nginx のパッケージ: nginx-mod-http-xslt-filter-1.10.2-1.el6.x86_64
--> 依存性の処理をしています: nginx のパッケージ: nginx-mod-mail-1.10.2-1.el6.x86_64
--> 依存性の処理をしています: nginx のパッケージ: nginx-mod-http-image-filter-1.10.2-1.el6.x86_64
--> 依存性の処理をしています: nginx のパッケージ: nginx-mod-stream-1.10.2-1.el6.x86_64
--> 依存性の処理をしています: nginx のパッケージ: nginx-mod-http-geoip-1.10.2-1.el6.x86_64
--> トランザクションの確認を実行しています。
---> Package nginx-mod-http-geoip.x86_64 0:1.10.2-1.el6 will be 削除
--> 依存性の処理をしています: nginx-mod-http-geoip = 1.10.2-1.el6 のパッケージ: nginx-all-modules-1.10.2-1.el6.noarch
---> Package nginx-mod-http-image-filter.x86_64 0:1.10.2-1.el6 will be 削除
---> Package nginx-mod-http-perl.x86_64 0:1.10.2-1.el6 will be 削除
---> Package nginx-mod-http-xslt-filter.x86_64 0:1.10.2-1.el6 will be 削除
---> Package nginx-mod-mail.x86_64 0:1.10.2-1.el6 will be 削除
---> Package nginx-mod-stream.x86_64 0:1.10.2-1.el6 will be 削除
--> トランザクションの確認を実行しています。
---> Package nginx-all-modules.noarch 0:1.10.2-1.el6 will be 削除
--> 依存性解決を終了しました。

依存性を解決しました

===================================================================================================================================
 パッケージ                                   アーキテクチャ          バージョン                      リポジトリー            容量
===================================================================================================================================
削除:
 nginx                                        x86_64                  1.10.2-1.el6                    @epel                  1.3 M
依存性関連での削除をします。:
 nginx-all-modules                            noarch                  1.10.2-1.el6                    @epel                  0.0
 nginx-mod-http-geoip                         x86_64                  1.10.2-1.el6                    @epel                   17 k
 nginx-mod-http-image-filter                  x86_64                  1.10.2-1.el6                    @epel                   21 k
 nginx-mod-http-perl                          x86_64                  1.10.2-1.el6                    @epel                   53 k
 nginx-mod-http-xslt-filter                   x86_64                  1.10.2-1.el6                    @epel                   20 k
 nginx-mod-mail                               x86_64                  1.10.2-1.el6                    @epel                   96 k
 nginx-mod-stream                             x86_64                  1.10.2-1.el6                    @epel                   73 k

トランザクションの要約
===================================================================================================================================
削除                 8 パッケージ

インストール済み容量: 1.6 M
これでいいですか? [y/N]y
パッケージをダウンロードしています:
rpm_check_debug を実行しています
トランザクションのテストを実行しています
トランザクションのテストを成功しました
トランザクションを実行しています
  削除中                  : nginx-mod-http-geoip-1.10.2-1.el6.x86_64                                                           1/8
  削除中                  : nginx-mod-http-image-filter-1.10.2-1.el6.x86_64                                                    2/8
  削除中                  : nginx-mod-http-perl-1.10.2-1.el6.x86_64                                                            3/8
  削除中                  : nginx-mod-http-xslt-filter-1.10.2-1.el6.x86_64                                                     4/8
  削除中                  : nginx-mod-stream-1.10.2-1.el6.x86_64                                                               5/8
  削除中                  : nginx-all-modules-1.10.2-1.el6.noarch                                                              6/8
  削除中                  : nginx-mod-mail-1.10.2-1.el6.x86_64                                                                 7/8
  削除中                  : nginx-1.10.2-1.el6.x86_64                                                                          8/8
警告: /etc/sysconfig/nginx は /etc/sysconfig/nginx.rpmsave として保存されました。
警告:    erase /etc/nginx/uwsgi_params.default の unlink に失敗: そのようなファイルやディレクトリはありません
警告:    erase /etc/nginx/scgi_params.default の unlink に失敗: そのようなファイルやディレクトリはありません
警告:    erase /etc/nginx/nginx.conf.default の unlink に失敗: そのようなファイルやディレクトリはありません
警告: /etc/nginx/nginx.conf は /etc/nginx/nginx.conf.rpmsave として保存されました。
警告:    erase /etc/nginx/mime.types.default の unlink に失敗: そのようなファイルやディレクトリはありません
警告:    erase /etc/nginx/fastcgi_params.default の unlink に失敗: そのようなファイルやディレクトリはありません
警告:    erase /etc/nginx/fastcgi.conf.default の unlink に失敗: そのようなファイルやディレクトリはありません
警告: /etc/nginx/conf.d/default.conf は /etc/nginx/conf.d/default.conf.rpmsave として保存されました。
  Verifying               : nginx-mod-mail-1.10.2-1.el6.x86_64                                                                 1/8
  Verifying               : nginx-mod-http-geoip-1.10.2-1.el6.x86_64                                                           2/8
  Verifying               : nginx-mod-stream-1.10.2-1.el6.x86_64                                                               3/8
  Verifying               : nginx-mod-http-perl-1.10.2-1.el6.x86_64                                                            4/8
  Verifying               : nginx-all-modules-1.10.2-1.el6.noarch                                                              5/8
  Verifying               : nginx-mod-http-image-filter-1.10.2-1.el6.x86_64                                                    6/8
  Verifying               : nginx-1.10.2-1.el6.x86_64                                                                          7/8
  Verifying               : nginx-mod-http-xslt-filter-1.10.2-1.el6.x86_64                                                     8/8

削除しました:
  nginx.x86_64 0:1.10.2-1.el6

依存性の削除をしました:
  nginx-all-modules.noarch 0:1.10.2-1.el6                             nginx-mod-http-geoip.x86_64 0:1.10.2-1.el6
  nginx-mod-http-image-filter.x86_64 0:1.10.2-1.el6                   nginx-mod-http-perl.x86_64 0:1.10.2-1.el6
  nginx-mod-http-xslt-filter.x86_64 0:1.10.2-1.el6                    nginx-mod-mail.x86_64 0:1.10.2-1.el6
  nginx-mod-stream.x86_64 0:1.10.2-1.el6

完了しました!
無事消えました。
古い nginx を削除すると冒頭にも書いた起動スクリプトが消えるので、
nginxの公式サイトに書いてあった内容参考に再作成します。
修正したのは以下の箇所。
# vi /etc/init.d/nginx

#nginx="/usr/sbin/nginx"
#NGINX_CONF_FILE="/etc/nginx/nginx.conf"
nginx="/usr/local/nginx/sbin/nginx"
NGINX_CONF_FILE="/usr/local/nginx/conf/nginx.conf"
起動スクリプトに実行権を忘れずにつけておきます。
# chmod 777 /etc/init.d/nginx
また、sysconfigファイルも修正してchkconfigに登録し直します。
# vi /etc/sysconfig/nginx

#NGINX_CONF_FILE=/etc/nginx/nginx.conf
NGINX_CONF_FILE=/usr/local/nginx/conf/nginx.conf
# chkconfig --add nginx
# chkconfig --list nginx
nginx           0:off   1:off   2:off   3:off   4:off   5:off   6:off
# chkconfig nginx on
# chkconfig --list nginx
nginx           0:off   1:off   2:on    3:on    4:on    5:on    6:off
エラー出てたので、nginx本体のパスもシンボリックリンク貼ります。
# nginx -t
-bash: /usr/sbin/nginx: そのようなファイルやディレクトリはありません

# ln -s /usr/local/nginx/sbin/nginx /usr/sbin/nginx
# ll /usr/sbin/nginx
lrwxrwxrwx 1 root root 34  8月  8 02:14 2017 /usr/sbin/nginx -> /usr/local/nginx/sbin/nginx
最後にdigest認証の設定箇所ですが
もう面倒なのでnginx.confに直接書いちゃいます。(default.confなんてなかったんや!)
# vi /usr/local/nginx/conf/nginx.conf

auth_digest_user_file /var/www/.htpasswd;
   location /secret{
   auth_digest  'Secret Zone';
}
ここでconfigtest。
# nginx -t
nginx: the configuration file /usr/local/nginx/conf/nginx.conf syntax is ok
nginx: configuration file /usr/local/nginx/conf/nginx.conf test is successful
おk。
startしやっす。
# /etc/init.d/nginx start
nginx を起動中:                                            [  OK  ]
終わりィ!
挙動テスト
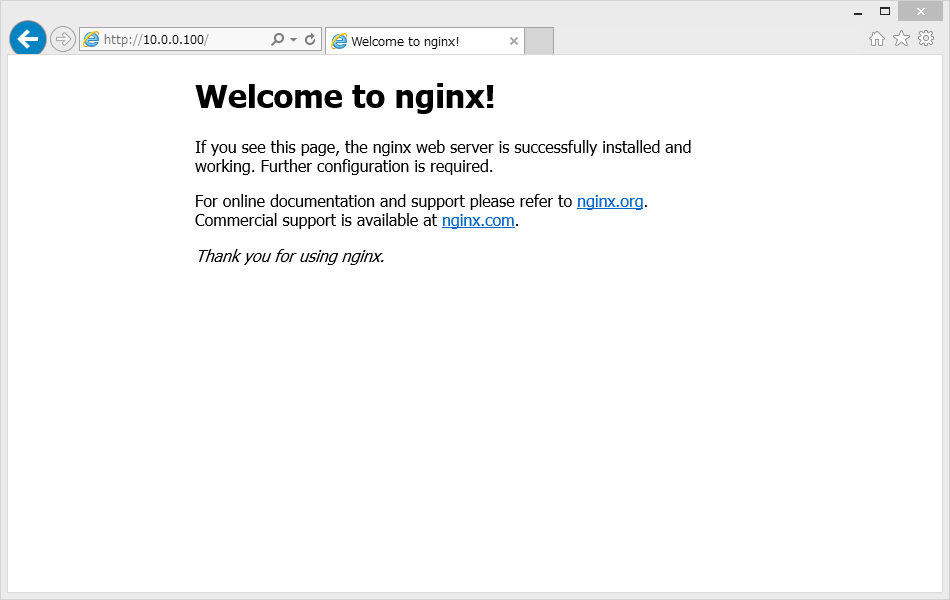
まずはそのままアクセス
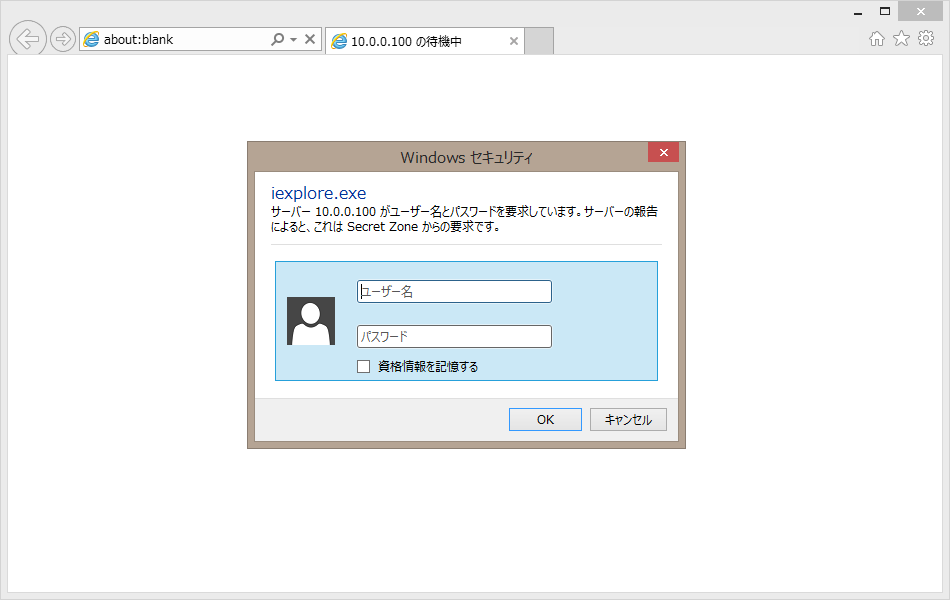
そしてhttp://18.183.225.540/secret/にアクセスすると…
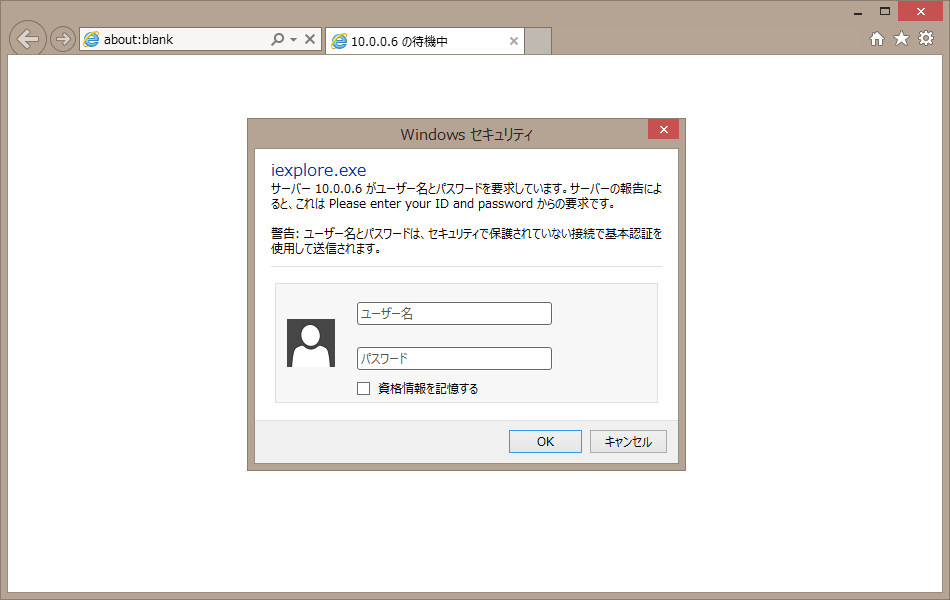
お、認証聞かれてる!
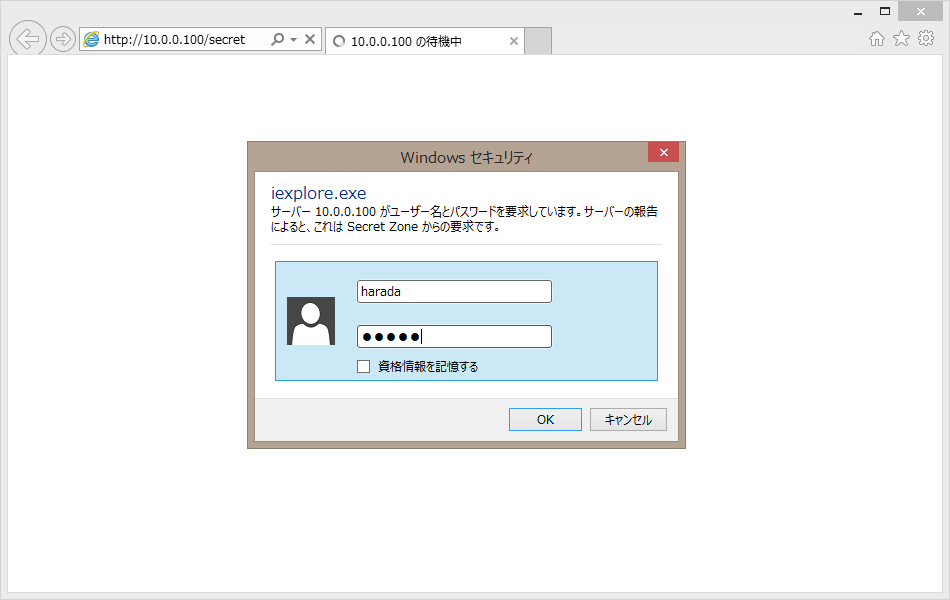
パスワードを入れたって…
やったぜ。
レスポンスヘッダの確認
さてさて、digest認証突破後のリクエストヘッダを見てみましょうかね…
Accept:text/html,application/xhtml+xml,application/xml;q=0.9,image/webp,image/apng,*/*;q=0.8
Accept-Encoding:gzip, deflate
Accept-Language:ja-JP,ja;q=0.8,en-US;q=0.6,en;q=0.4
Authorization:Digest username="harada", realm="Secret Zone", nonce="17f7e76459899d56", uri="/secret/", algorithm=MD5, response="0d1bf15793d6b686673b24f719b86f7b", qop=auth, nc=00000001, cnonce="39256fbeb67c3097"
Cache-Control:max-age=0
Connection:keep-alive
Host:10.0.0.100
If-Modified-Since:Tue, 08 Aug 2017 09:17:07 GMT
If-None-Match:"59898193-5"
Upgrade-Insecure-Requests:1
User-Agent:Mozilla/5.0 (Windows NT 6.3; Win64; x64) AppleWebKit/537.36 (KHTML, like Gecko) Chrome/59.0.3071.115 Safari/537.36
お!
Authorization:Digest username="harada", realm="Secret Zone", nonce="17f7e76459899d56", uri="/secret/", algorithm=MD5, response="0d1bf15793d6b686673b24f719b86f7b", qop=auth, nc=00000001, cnonce="39256fbeb67c3097"
Digest認証有効になってる!パスも暗号化されてる!

あとがき
今回はベーシック認証とダイジェスト認証の違いについて
nginxでのダイジェスト認証の設定方法についてご紹介しました。
今回はNginxでdigest認証を使うべくソースからインストールしましたが
既にyumで入ってたnginxを消し去ってまでやったので、普通に運用してるサイトでは使えん方法になります。
乱暴な方法なので、今度時間があったら既存のNginxに影響与えないよう
反映できたらなぁと反省してます。
– 終 –
==============
※参考サイト様
https://donabeneko.jp/blog/20130413134434
https://no-ne.ws/computer/1609#i-6
http://qiita.com/HayneRyo/items/eccc36302623088ad7f3
http://d.hatena.ne.jp/ozuma/20140905/1409850688



![[WIP]Seleniumを使って遷移監視ができるか検証してみた](/content/images/size/w100/2023/11/----------1-.png)
![[WIP]Windows Server 2016を使ってHyper-Vレプリケーション設定](/content/images/size/w100/2023/11/----------2-.png)